Seriously- no excuse for being MIA for a long time. I am sure the two people (hey Kara and Michelle) that follow my blog have been missing me. Okay, well maybe the excuse that I am currently growing a human being inside of me might count as an excuse. That's right. Baby Phillips due February 1st. Mr. P and I are very excited and finally have hit that second trimester where my energy is coming back. I actually swept and mopped (enough dog hair to form a small terrier) from our downstairs last night. I have only really done 1 project this whole summer (gasp!) and it was changing our bedding, doing lots of spray painting (this is my excuse if our kid comes out wonky), and making a headboard. Besides that I have been sleeping and napping. The end.
Something fun to do will be that I am going to tell you 20 secrets- ready, get set, go!
20. Knitting scares me. It truly does. Counting, tying, big loops, little loops... its creepy.
19. I am obsessed with cheap Bic pens. I have a whole jar upstairs and a whole jar downstairs. I get really mad when I cannot locate a cheap Bic pen. They are the best.
18. My favorite week is the week before school starts and I listen to loud music and make my classroom totally cute. My least favorite week is the actual first week of school. It is too hot to think- let alone learn, and the kids need lots of training!
17. I love to watch Jane Austen movies. I have probably watched Sense and Sensibility at least 100 times and Pride and Prejudice too. I have read each book once. I must say the movies are easier to follow.
16. I should read my Bible more... less chick lit- more Scripture.
15. I became super self-conscious about upper arm jingle when I saw it randomly flap this past school year when I wrote on the board... messed me up big time.
14. I count Mr. P's gray hairs when he sleeps (current count-18).
13. I still worry about my childhood dog, Hershey. He lives at my parents house and is 14. I will breakdown when he dies.
12. I just learned to sew this past year and am getting much better. I made a whole baby quilt. By myself. Which is only slightly lopsided. And has a few holes.
11. I am terrified to become old and "out of the loop". AKA my grandma who thinks texting and emailing are exactly the same thing.
10. I am a constant worrier. Big things, little things, worry about it all.
9. I don't doo much on my blog because I don't like my camera. Give me $400 and I'll get a new one.
8. I love having good friends, but lose patience with ones that are too hard to maintain.
7. I wish I didn't tell Mr. P little fibs "what this vase? Totally got it for Christmas- duh!" (As I scrape off the HomeGoods tag.
6. Always wished I had an orange tabby cat- but I am allergic and everyone I know hates cats.
5. Will always remember my mom telling me, "Go to school. Do something for yourself. No one can ever take that away from you." Am proud of my degree... not the student loan payment, but the degree.
4. Also remember my mom telling me, "High school is overrated. Let's play hooky tomorrow and go shop." MMm... ok!
3. Has really good friends. Friends from childhood, friends from college, friends that know every secret, and friends that you don't talk to for a month- but its like you never left off.
2. I still play with my American Girl dolls. True story. My parents gave them to me (read: said you are grown up and married- you store them) about 2 years ago. About every 2 months I get them out, brush their hair, and enjoy them. Not creepy. Totally sentimental.
1. I am excited. About the next phase of life. Being a mom. It will be great.
Friday, July 23, 2010
Wednesday, April 28, 2010
Life, Liberty, and Love


I decided this year to decorate at the beginning of May for Memorial Day, Independence Day, and Labor Day all in one. That way I am not switching between summer decorations and holidays. Plus, I love Patriotic stuff. I followed Jen's tutorial, but went for a little less burlap since I had such a big wreath frame. I also opted for a lighter burlap and used a patriotic paisley bandana for the fabric pieces.

I also used the words life, liberty, and love- because that is what America means to me!

Definitely love the end result and it was a perfect end of the school year project... I sat on my couch and cut circles while watching a mindless movie!
P.S. I know you are a bit jealous of my Uncle Sam. I became a bit obsessed when I saw him at my mom and dad's... let's just say my mom had to repurchase one for herself!
Tuesday, April 20, 2010
Two Cuties in Tutu's
Well my good friend Karen just welcomed their second sweet little girl into their family. Big sister Jadyn now has little sister Ziara. (Zee-are-ah). I know... I needed help pronouncing that one too! (just kidding Karen). Karen and I have been friends for over 10 years. She was my manager at Old Navy, my first real job. I love her. I love her kids. She has spunk.
I had hoped to plan Karen a little "Sprinkle" to welcome in her newest addition, but with her working a gajillion hours (true time span people) right up until her water broke, it didn't happen. Instead I worked on two applique outfits for the biggie and the lil girl.

Aren't they cute? I used my Cricut to cut out the letters for both on fabric using the Schoolbook cartridge. I then ironed it on mirror-image style to the wonder under and sewed it on. I had red and light blue tulle and I thought the black and white polka dot material made a great contrast. I used the basic concept from Joy's Hope to do the tutu part.

Here is Jadyn, proudly modeling her tutu shirt. I am told she loves it dearly and likes to dance around in it. I am anxiously awaiting her first recital. :)

So cute huh? Isn't she yummy? She still has some room to grow into it- but last I heard she has been growing lots!
These were SUPER easy and fun to make. I am glad the girls enjoy them. Congrats Karen and Darren! I love you guys and am so happy to see your family grow with God's great blessings!
Thursday, March 11, 2010
Now Returning to Regular Blogging
Well. I took a 'lil break from the world of blogging. It was all due to the following:
*my emo birthday
*girl's trip to California for a Kindergarten Conference
*yard saling
*spending some time with Mr. P
*being superbusy with church stuff
*listening to this weirdo

(disclaimer: it is total weirdness, but a new obsession)
*making baby shower gifts
*trying to make birthday gifts (craftastrophe people)
*being lazy
However, on the uplook, next week is Spring Break- so I am excited to get LOTS of things done and to do a fun overnighter with some girl friends and seeing the Mr. P a little more than usual.
Well... I am alive. And will be tuning in next week to show off my cool chair birthday present and some good Easter projects.
Friday, February 19, 2010
26 today
Well- today I turned 26. This is the first year I have really noticed and felt older.
I would like to almost forget today happened.
It is not often that I let myself get sad or down, but today I was feeling it.
Another friend is having a baby.
One of many; ready to take that step and be a mom.
I am jealous.
When we first got married, I laughed it off- we were too young.
Then I felt a tiny pang of jealousy.
Now it is a full out, stab in the heart, overpowering sadness.
But are we ready?
Days like today when I am feeling mad, upset, and alone?
When we argue over who should take out the trash or feed the dogs?
Maybe not.
So, I feel old... steps behind the rest of the world and where I always envisioned myself.
Kara brightened my day with my favorite form of caffeine.
Michelle overdid and bought me my beloved bee stuff from Hobby Lobby so I can throw a cool picnic. And carbs for lunch (oh how I miss thee!)
My cute kindergarteners threw me a (not at all... they blabbed) surprise party, complete with cards, gifts, a BEE themed cake ( I have an obsession), a dozen roses, and squeals of laughter.
But at the end of the day- I still don't like 26.
Monday, February 15, 2010
Salvation Saturday
No- this post is not related to Jarrod... they are all about the Salvation Army spree me, Michelle, and Kara went on this past Saturday. We hit up three Salvation Army stores, one Goodwill, and the DI (Deseret Industries). I walked away with these cheap and awesome purchases-


This lovely chair- $4 at Salvation Army

This grease-spackled spice rack-$1 at Salvation Army

This kidsy lamp-$3 at Goodwill (don't be jealous of our Chuckit)

The chair was very scary. Even though I bought it Salvation Army, it had two old stickers from DI on it- so I think someone tried to redo it once but lost the nerve. The person that put it in this lovely form needed to learn a few redo tips- such as: sand off old paint before repainting, don't use hot glue to reupholster! Here is Sergeant Sausage, my crafting partner, checking my progress from inside the house, always the helper!

To redo- I did this:
1. Cleaned the entire chair with Comet.
2. Used a fine sandpaper block to sand off the many scary layers of paint and varnish
3. rewiped off all of the surfaces
4. Primed the entire chair with Rustoleum spray primer (from Home Depot)
5. Spray painted the entire chair with flat black spray paint
6. Reupholstered the seat cushion with black and white damask fabric
7. Added black cord to the entire edges of the cushion
8. Redrilled the cushion into place
And finally- stepped back to admire what a bad-A I am!

I know what you are thinking- is that trim I see on that cushion... it's true!

I also scrubbed the spice rack with Comet to remove at least 20 years of cooking grease off of it, primed with spray paint primer, and then spray painted.

Now it is a cute little thread holder with two drawers for my bobbins (one new unused ones and one with thread on them!)
For the lamp redo, I decided I wanted it to match my chair with both fabric and colors. I liked how the original shade had two colors and ric-rac so I decided to copy that look with a more grown up approach.
I primed and spray painted black.
For the shade I did the same process as with my sister's lamp- but did a black strip of home upholstery on the top and the damask upholstery on the bottom. I spray adhesived them on one at a time, folded for the back crease, and hot glued the tops and bottoms the best I could. I then hot glued ric-rac around where the two fabrics meet.

Total Chair Cost: ($4 chair, $3 fabric, $2 trim, about $2 worth of primer and paint) Total $11
Total Thread Rack Cost: ($1 spice rack, about $.50 primer and paint) Total $1.50
Total Lamp Cost: ($3 lamp, about $2 worth of fabric, $1 ric-rac, and $.50 primer and paint) Total $6.50
Overall- some rocking good deals and LOTS of fun hunting for them and redoing them!
Don't worry--- I still have lots more projects remaining to show off!
Tuesday, February 9, 2010
52 Things I Love About Jarrod Cards

I remember that when we first got married my Mom told me that your husband is either a romantic man or a man you try to make romantic for the rest of your life together. After the first year of realizing I was experiencing some unrealistic expectations I decided to stop trying to make Mr. P into something he wasn't.
However, I can't help that I like to use Valentine's Day, his birthday, our anniversary, and other holidays to show Mr.P how much I love him.
I saw on Tatertots and Jello her playing card Valentine coupons and thought they were SUPER cute- but unrealistic for Mr. P. He would throw them in a drawer and never use them. So, I decided to use playing cards and the same idea to do 52 things I love about him on playing cards. Which, after I explained my idea to her, Michelle told me she saw them somewhere on some blog- but here is my version of the cards that once I googled I found here.


Some of my favorites include:
How cute our kids will be
Your Nice Butt
How easy it was to say yes to you and the rest of our life
I hope you enjoy and maybe found a cute idea for your man!
P.S. Today I got this from one of my kindergarteners--

Do you think they got ideas from my classroom decorations? Hehe :) In my defense: Mr. P does bare a striking resemblance to Edward!

Thursday, February 4, 2010
Lovely Lamp
The lamp is done! This is the lamp I bought my cute little sister on Saturday at the Salvation Army.


It was 55% off day so it ended up being just a little more than $6. My sister is getting ready to move out from my parents house (FINALLY--jk Em). She was looking for a lamp that went with her ultra modern black and white and scarlet motif in her soon to be living area. I told her I could make a lamp for her for supercheap...versus the $45 ones she wanted to buy.
I got out my best friend, Mr. spray paint and gave the base two good coats of flat black paint.
We went to Joanns and she picked out the fabric she wanted. I bought 1 1/2 yards because it is a HUGE lampshade. I used a 50% off coupon so it ended up being $7.50. I ended up using exactly half.
I started by pulling the large trim off of the top and bottom of the lamp because I didn't want it to be bulky once it was recovered.

I then measured my fabric so I could cut off the excess to save for something else. I cut right down the middle and made sure there was more than enough to leave some space to fold over each side of the lamp... look closely and you will see my crafting partner Sergeant Sausage checking my progress.

I then took the lamp, fabric, and spray adhesive into the garage so I could not kill our dogs with aerosol fumes.

Then, lay the lampshade so that the back seam starts where the end of the fabric is. I sprayed about 10 inches of fabric at a time. Because it was so large of a space, I also sprayed the shade too... for more a more permanent hold. This was the trickiest part. I had to go in small sections so that I could stretch the fabric and make sure I was lining up the pattern as close as I could.

Lastly (notice no picture... I got on an excited roll again) I hot glued the fabric to the top and bottom of the shade. I stretched and glued and tried to keep the fabric the same all the way around so if you see it from the inside it doesn't look messy.
And here's the final product:

I set it on our end table to get a feel for it. I felt I would like to keep it for myself. The thought then doubled when Mr. P said he liked it and wanted to keep it too. I called Emilee to come pick it up ASAP so we didn't steal it (we have a habit of doing this). So- I am now on the lookout for cute lamp #2 to redo for us.
Total Cost:
Lamp-$6
1/2 of fabric- $3.75
Spray adhesive- owned
Flat black spray paint- $1
About $11! Cute!
Tuesday, February 2, 2010
Thrift Store Cool
When I was little my dad used to go to thrift stores all of the time and drag us kids in there. I. hated. it. I hated the smell and touching stuff. Then I got older and of course what is my new addiction? Thrift stores. Michelle and I went to a few Goodwills and Savers- but in our area everything was SUPER overpriced. We were used to yardsales where the common price is a dollar.


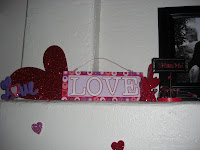 The bird lives next to the Love sign on the mantel.
  The red pot is filled with glittery hearts and a big heart.


 Geese not your thing? Mine either!

 A $6 lamp I am redoing for my little sister who is about to venture out on her own. Good thing her cheap and crafty sister is saving her money versus those $45 lamps she wanted to buy. Come see tomorrow what it looks like done!
Well, we went to the Salvation Army one day on a whim last month and that is where we ran up and down the aisles squealing with delight. Full carts later I had lots of cool buys for less than $20.
After some red spray paint on my $1.50 pot and my $.50 bird (which Michelle said was creepy and now covets) they are ready for Valentine's Day.


 The bird lives next to the Love sign on the mantel.
 The red pot is filled with glittery hearts and a big heart.
A little pink on the blueberry topiary and it too is ready for it's close up.


My favorite was this little country chic gem.
 Geese not your thing? Mine either!
Too cute now. A little pink spray paint and pink glitter and voila! A cute bathroom decoration.

The lesson I learned is this: thrift stores are great but you have to find the right one. It took some hunting for us to find one where it was worth the money to dig and redo it. I love making stuff, but if the cost factor isn't part of the deal... then it's easier to just go buy what you want. You also have to look at the potential of things- which takes time. I will post more of my Valentine decor later- I have been busy working on this little gem...
 A $6 lamp I am redoing for my little sister who is about to venture out on her own. Good thing her cheap and crafty sister is saving her money versus those $45 lamps she wanted to buy. Come see tomorrow what it looks like done!
Saturday, January 30, 2010
Carter's Birthday Shirts
To go along with his Thomas chair, I made Carter two applique shirts. One is Cars themed to wear to his party tomorrow and the other is one of those cute tie applique ones. The Cars one turned out super cute:


I bought the t-shirt at Hobby Lobby for $3, the Cars patch there too for $2, and got the race flag fabric there for $.50 for 1/4 yard. I already had the red, black, and Wonder Under. I simply cut rectangle sized pieces of each fabric I was using and then ironed on the Wonder Under to the back (on our couch while watching a movie), I then made templates on cardstock and traced them onto the Wonder Under once it had cooled, cut, and ironed. I used my machine to stitch a red zigzag stitch through out the entire thing. I got excited because it looks pretty darn good for a beginner sewer.

The tie one was SUPER easy. I got the template for free offline and just expanded it since he is 3 and not wearing a onesie like the original template called for. I got the gray shirt at Dollar Tree (its Hanes though), and the fabric at Wal-Mart $.50 for 1/4 yard also. I followed the same steps, just switched to a bright blue contrasting zigzag stitch... I really like a good zigzag.
I have all of my Valentine's projects done and put up... but as you can see from most all of my blog pictures- I need to wait until daylight to photograph them. Since my average arrival time home Monday-Friday is 6:30, I never hit daylight. But, I will take some pictures of Carter's big party tomorrow. Hopefully my mom can take some deep breaths and chillax some. Geez- I don't know where I get my type A tendencies... It's so weird. Well- more to come.
Talk soon!
P.S. Hit up the Salvation Army today for some bday gifts for Kara. Got more new projects to start! I love the SA!
Wednesday, January 27, 2010
From Purple Monster to Cuteness
Carter, our adorable nephew, will turn 3 on Sunday. With his birthday being just a month away from Christmas I found myself in the usual gift giving dilemma. Do we get him MORE toys... well since my dad was taking his unwrapped Christmas gifts to save them for his Birthday since he got SO many, I think not.


Instead, my friend Kim gave me this chair...

Which I lovingly dubbed the Purple Monster. She had got it Savers for $7 and had planned on re-covering it for her daughter, but never got around to it. Since she loves me and I give her son the gift of wisdom each school day she bestowed it upon me.
Now- I won't lie. It sat in my garage for over a month... collecting dog hair from the broom and looking pretty sad. But, I was scared. What a BIG project... a scary project. But- with his birthday looming closer, I sucked it up and started getting to work. I bought my Thomas fabric at Wal-Mart for $4.44 a yard. The kid loves his tank engines... he was Gordon for Halloween and must own at least 50 of them. I started optimistically with 1 1/2 yards... and went back for another yard later.
It was horrible ripping everything out. Whatever sweat shop made that sucker did a great job! After two bloody cuts and lots of cutting and ripping- I was ready to reattach. That part was fun. It was so easy to transform something not so cute into something great. I started with my Dad's staple gun... which is what I call a man gun... it was horrible. After hearing me grunt and watching me use my body to get the torque to push the staples in, Mr. P mentions we own a staple gun! A nice, sleek, girl gun. So- after a week and a half of pulling staples out of my hair, here she is!

Total Cost:
Chair- Free (thanks Kim)
Fabric 2 1/2 yards - $10.00 even
Staples- already had
Fabric 2 1/2 yards - $10.00 even
Staples- already had
Felt for Bottom of Chair- already owned
All said and done- SO worth it to see a smile on his face! Years from now any toy we would give him would be at Savers- but I am sure he will remember the time his Aunt Ashee made him a special reading chair (complete with book pocket).

In case you're wondering about this AMAZING Halloween costume- yeah I made it... just saying! And he's Gordon the Tank Engine... NOT Thomas!
**Disclaimer-- I look like a wildebeest in this picture- uh! I was so brokedown that day!
I will show you the rest of his handmade gifts tomorrow- I am tired and have staples to vacuum up!
Tuesday, January 19, 2010
Tulle Valentine Wreath

I wish I could take all of the credit for this supercute, supereasy Valentine wreath, but my mama actually came up with the idea. I showed her a picture of the black Halloween tulle wreath from another blog and she said to just make it with a heart and Valentine colors for February.
To make this you need a heart wreath form ($3.99 at Joann's), tulle (2 yards for each color if you want it to be two colors, or 4 yards total if one color), spray paint, ribbon, hot glue gun

This wreath was for my mom (she's the brains I am the creator). She chose red and bright pink for her colors. I spray painted her wreath form bright pink in case any tulle spots were not covered. Then get ready for your tulle by keeping your tulle folded in half, but cutting it into 8 strips, each about 5 inches wide.

After you have 8 strips per color ( you should have a small amount left from your 2 yards), cut each strip along the foldline; making two strips from the one piece. Then, cut the two strips into thirds. This does NOT have to be done perfectly... its a messy wreath. You should end up with 48 pieces of tulle in each color. (haha college algebra...)
 Two piles: ignore large glare from kitchen table and flash!
Then, just start tying your tulle around the wreath in an AABB pattern. I doubled up so it made the different colors very apparent. Go all the way around and then fluff when you are done to make it look like this.

Simply add some ribbon by hot gluing it to the back and voila! Cute, cheap, no sewing, and easy!
Well- I have a LOT to do this week:
1. start recovering the purple chair for Carter's birthday ( I am scared)
2. finish making puffy Valentine hearts
3. finish all valentine projects (wood blocks, banner, etc)
4.make Carter a cute shirt to wear for his party
5. Still work, tutor, cook, clean, and be my usual adorable self!
Talk soon-
Monday, January 18, 2010
Crafternoon Kick Off


This Saturday Me, Michelle, and Kara (another lifelong friend) and I all got together to start our biweekly crafternoons. We meet at Michelle's house (which needs to move 20 miles closer to mine) and do a craft project together. We decided to have one person choose each project and then tell everyone what to buy so that way we can get right to work without going to the store for materials. Well, I chose the first crafternoon project: A Valentine Tree.
Michelle and I became obsessed with seasonal little trees around Halloween time. They showed up at Home Goods and Real Deals and we snapped them up. Once we really looked at them we realized we could easily make them ourselves. Here's what you need:
 Large woodsie heart shapes and small ones, brushes, acrylic paint, glitter, and 20 gauge craft wire
 A small pot (mine I got for 90cents on Michael clearance over the summer), a branch positioned in the pot with Joint Compound or cement and some moss.
Start by spray painting your pot, I chose red pot color and a pink branch. We let our branches sit in joint compound overnight, but they really could have used up to three days to dry all of the way.
While your pot/branch combo is drying, simply lay your heart pieces out and start painting both sides, and edges.

After the paint has dried, use some fine glitter and Elmers glue and "paint" it on each heart, we only did the front side.

After the paint has dried, use some fine glitter and Elmers glue and "paint" it on each heart, we only did the front side.

While waiting for your glitter/paint combo to dry, start using wire clippers to cut your 20 gauge wire into pieces. I did each piece about 9-10 inches long. I then twisted it around my branch so that one piece made two branches on the tree. Then, I curled the wire around my finger and released it so it was cute and curly.
After your hearts are dry, hot glue them randomly to the end of a craft wire. I added some randomly to the middle of branches. Then, fill your pot with moss (Dollar Tree) and then hot glue the rest of the hearts onto it so it looks like they fell off the tree and landed there.
Tada...
 Hmm... I really need to learn how to rotate pictures... just flip your head sideways- you'll get it!
Total Cost: Pot -$.90, joint compoud-already had, moss- $1 we all shared 1 bag, paint-had, glitter-had, branch- our custodian found them in a riverbed, hearts $2.90 at Joann's for both
Wire- $3 at Walmart- we shared one roll
Per pot cost: about $4
Tomorrow should be busy- 100th day of school, then going to spend our savings on another textbook for Mr. P.
Day 15 Carbfree... fell off the wagon Friday night, got back on Saturday... 5.5 pounds total lost!
Subscribe to:
Posts (Atom)